INSTRUCTIONS ON SOIL PREP, SOD INSTALL & TURF GRASS MAINTENANCE
It’s extremely important to prepare your soil before you lay sod over it. We can’t emphasize this enough — your grass will only turn out as good as what you do with the soil. It’s like building a house — the house will only be as good as the foundation, and your new lawn will only be as good as your soil preparation. Even top-quality turf grass products from Emerald Sod Farms will struggle if it’s laid over a solid layer of clay or if there are no organic materials in the soil.
If your new lawn is installed following house construction or foundation work, do not let your contractor spread select fill clay across your yard. Even if rototilled, the clay in this select fill will tend to form a barrier to root growth and soil moisture under your new sod. It will hurt the health of your lawn for years to come.
1. Remove all weeds and debris. We recommend using a weed killer like Roundup to knock out existing weeds and grass. The easiest way to remove the old grass and weeds is to rent a walk-behind sod cutter. Of course before you do that, it’s still best to spray with Roundup and kill everything. Pick up the piles of old grass and weeds and remove them from your property.
2. Establish a rough grade to your project area and eliminate the low spots.
3. Add a minimum of 3 to 4 cubic yards of planters mix organics per 1,000 sq. ft. of project area. Rototill the organics into your soil as deep as possible. We recommend at least 6 inches of topsoil, but more is better!
4. Rake out rocks, dirt clods, and other debris and remove them from your project area. Get a rough grade across your project area — eliminating bumps and low spots.
5. If you have a sprinkler system it’s time to get your sprinkler system back in shape. Make sure your sprinkler system covers everything, because so many of the sprinkler people will skip sprinkler heads to save money. You wind up with diamond watering patterns because the sprinkler heads won’t reach all areas of your lawn. Your grass could die if your sprinkler company doesn’t install enough sprinkler heads to ensure complete coverage. Make sure your sprinkler spray patterns are overlapping, not just touching but overlapping.
6. Sub-grade areas surrounding sidewalks, curbs, and gutters approximately 1.5 inches.
7. Create a final grade as well as you can by filling in the lows and remove soil from the highs. We don’t recommend that you use a roller across your project area. You should work with a rake and get it nice and smooth and break up any dirt clods. If the clods don’t break apart, then rake them out. Get your project area as smooth as you can. Run your sprinklers or spray water across your project area to settle the soil, and then you’re ready to lay your sod.
8. Call Emerald Sod Farms to arrange for pick up, delivery or installation of your sod. We ask for 24-48 hours of notice on deliveries and installs. Please call ahead to let us know you are on your way for a pick up order. We want to deliver your new turf grass sod as fresh as possible!
1. Do a final rake, eliminating all equipment tracks.
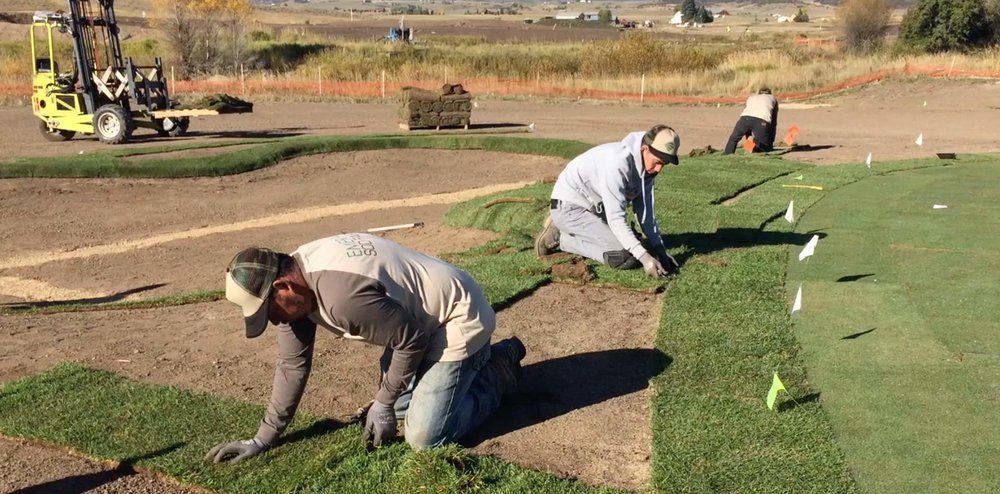
2. When the sod is at the site, arrange the sod so that there is minimum traffic on the prepared soil and newly installed grass.
3. Lay the sod in a manner similar to laying bricks.
4. Butt the edges of the sod tightly together making certain that adjacent sod strips don’t overlap.
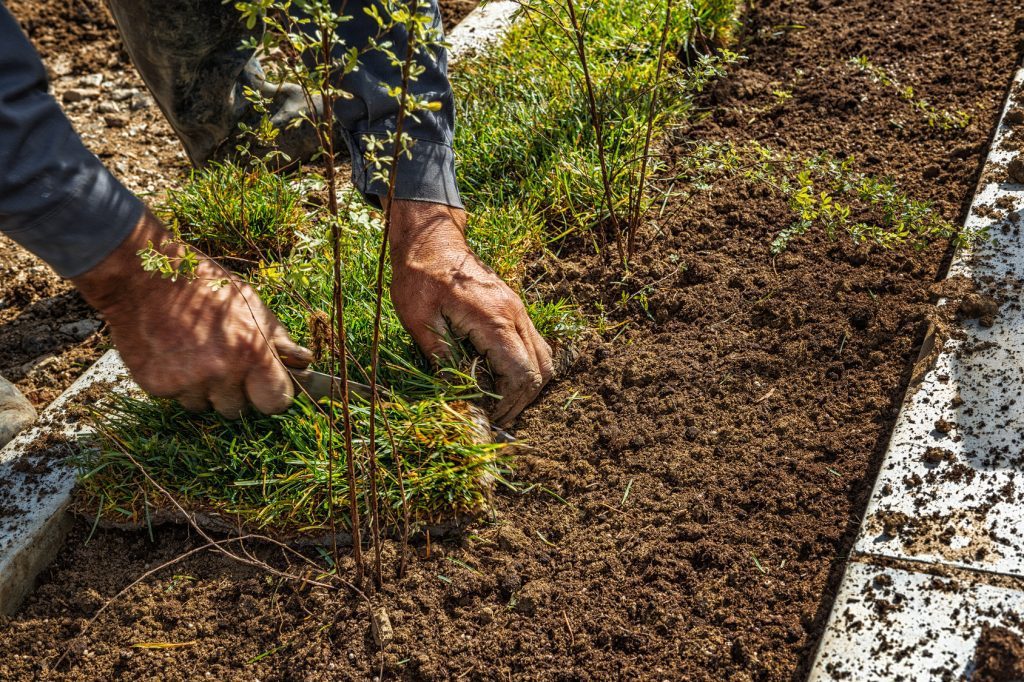
5. To fit around obstacles or to remove excess sod from a strip, merely cut the sod with a linoleum knife (preferably on the underside).
If you need any help with your sod installation, Emerald Sod Farms installs several kinds of sod in various locations. From your backyard to your commercial area to your park to your golf course; we have you covered. Whether your job is large or small, challenging or straightforward, we will gladly take your project on. Contact us today to book your next sod install or for more info!
1. Pick up all extra pieces of the sod from cuttings, sweep sidewalks, etc.
2. Give the sod a good “soaking” making certain the water penetrates the soil 4 to 6 inches. The initial “soaking” should be done as soon as a pallet of sod is laid or an area approximately 15 × 15 feet has been installed. Be sure to keep your sod “soaked” for the first 10 to 12 days. You may have to water lightly three to four times each day to keep the sod blades moist. If you get rain and it’s cool, you may water less, but if it’s hot and dry and the wind is blowing, you may have to water more. The first few days are CRITICAL!
After the sod has knitted to the soil, water every 2 to 4 days. However, the frequency of watering depends on the soil type, topography, natural precipitation, wind, temperature, humidity, etc. It is better to apply 1/2″ to 3/4″ of water at each application rather than lesser amounts daily. Water when the grass needs it. Learn to read the dehydration signs.
1. An early sign is a purplish cast where the leaves begin to fold and roll. You may leave footprints when walking on the grass.
2. A significant sign is when the grass turns steel gray and grass blades begin to shrink in width.
3. Another sign of dehydration is when the grass becomes straw colored. The roots are still alive and will give rise to new leaves in time with adequate watering.
Each of us has a responsibility to conserve water. Watering the entire lawn with the same amount and frequency will result in some areas being over watered and others without enough water. Don’t set your sprinkler clocks and forget them. Adjust your watering to climate conditions and above all exercise good judgment. If you’ve had rain and the temperatures have been cool, you can cut back on watering. If it has been hot and dry and the wind has been blowing, you should water more than your regular schedule. Remember that plants don’t waste water — people do!
Your lawn needs water in winter too — even during the cold winters we experience in the Denver area and the Rocky Mountain Region. Winter watering should be done every 3 to 4 weeks depending on weather conditions. We can harvest sod during the winter when the grass is dormant, but your new sod must receive water during the winter to be able to green up rapidly in the spring. Talk to us about care of your lawn sod if you plan to install turf grass during the winter. We’ll be happy to provide you with the guidance you need to ensure a successful sod installation!
Another important fundamental to having an exquisite lawn, besides watering, is proper mowing. Not just the appearance, but of more importance, the general health and vigor of the lawn depends on a good mowing routine. Only a properly adjusted mower with a sharp blade should be used. If you notice a ragged edge on your grass blades after you mow, your blade is not sharp enough.
On new sod, we recommend that you set your mower to cut at 3 inches and work it down slowly with later mowings. You might eventually get down to 2 inches or an inch and a half, but we suggest that the inch and a half is as low as you want to go. If you cut your grass shorter than that, you’ll set yourself up for more maintenance to keep your lawn healthy.
You don’t hurt your lawn by mowing it at 2-1/2 inches over the long term. It’s actually better for your grass to have more leaf surface to do what it needs to do, which is osmosis and transpiration and photosynthesis. More leaf area means your lawn can take in carbon dioxide and carbon monoxide and put out more oxygen. We recommend that you pick up your clippings if you don’t mow at frequent intervals with a mulching mower. If you see grass clippings in clumps behind your mower, it’s time to attach the bag to your mower and gather the clippings.
Your first mowing should be after the sod has had time to knit with the soil or is high enough to mow. During rapid growing times it may be necessary to let sod dry enough to permit mowing during the first 10 to 12 days. The first few mowings should be done with a rotary mower, diagonal to the way the sod was laid. Subsequent mowing should be done whenever the grass clippings will measure approximately 1/2″ or 25% of the above-ground grass plant. Never cut off more than 33-1/3% of the plant height at any one mowing. Removal of a greater percentage of the plant may result in shock, unsightly appearance or may make your lawn more susceptible to disease.
In addition to watering and mowing, fertilizer application is a fundamental part of lawn care. Fertilizer should be applied as directed (generally on the back of the fertilizer bag) during April to May, June to July, and August to September with a cyclone rotary-type spreader. Sweep all concrete areas that may have been pelleted with fertilizer. Be sure to water thoroughly after each fertilizer application.

